Now comes the all-important step, the pattern for laying the tiles.
You can choose different styles, depending on the size of the room, the tile design and other related factors.
There are some patterns that are more traditional, while others are relatively contemporary.
Given the huge range, style and structure of tile laying patterns, making a choice can be tricky.
Therefore, decide on a pattern carefully based on several factors. The location, budget, type of style, wall condition and user profile are some of the key factors that impact your choice.
1. Basket Weave
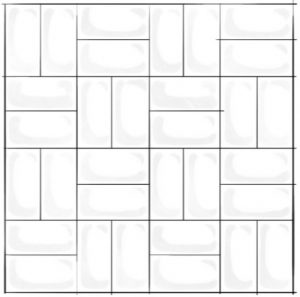
In this pattern, you will have to use rectangular tiles.
Two tiles are placed next to each other in a basket weave, to form a square.
The next two are then laid into a square at a 90-degree angle to the previous one.
As you progress, you will notice that the horizontal and vertical tiles alternate with each other in each row.
So you the impression of a basket where the tiles are woven over each other.
2. Vertical Herringbone
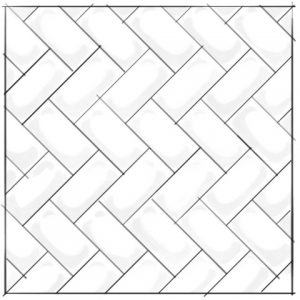
This is the same herringbone pattern but aligned vertically.
The advantage of this type of alignment is you can conveniently use it on the walls and get a chevron pattern on the walls.
Moreover, this is an interesting way to create a variation on the walls if you don’t want the linear pattern in particular. Small sized rectangular tiles work best for this pattern.
However precision is crucial. This is why you must account for at least 20% more tiles for this design.
3. Stretcher Bond 45 Degree
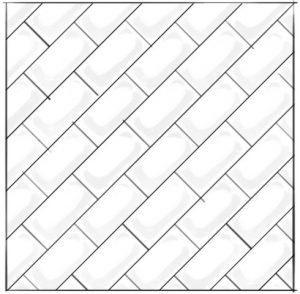
As the name indicates, the tiles are laid in a straight line but at a 45 degrees angle. This is also a common tile pattern for walkways and driveways.
It is relatively simple in terms of installation but at the same time needs accurate measurements. The ending of the rows is particularly crucial.
All the tiles are aligned at 45 degrees, and you have to measure accurately for best results.
The idea is to ensure that the overall look and pattern remains intact. In this case, as well, you must account for additional tiles for potential breakage.
4. Small Format Brick Bond
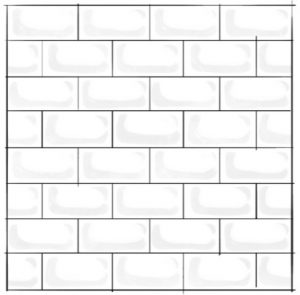
In this case, the uniform size of rectangular tiles is laid in horizontal lines.
The placement is such that the tiles in one line are in between the two in the line above. That gives it the feel of a long thatched brick wall.
It is most commonly used in bathrooms and kitchen. You can call it more of a functional design than a decorative one.
But if you are creative enough, you can mix and match patterns to introduce interesting concepts. This is an extension of the core stretcher bond pattern.
5. Running Bond

This looks equally stunning in plain tiles as well as patterned ones. The idea is how and where you install these tiles. Depending on the design and pattern of your tiles, you can install them.
From the exterior walls of the house to a kitchen floor in a restaurant, this pattern can be quite appealing. In many ways, it is the stretcher bond format pattern, executed vertically.
So here again, you have the tiles placed in between the previous two in the preceding line.
6. Straight Or Stack Bond
This is the simplest of the tile designs. In this rectangular or square tiles are placed one after the other in neat and straight lines. The final look is similar to that of a grid.
Make sure that you buy all the tiles for this from the same batch. This is because a difference in batch sometimes results in minor colour variations.
That does not augur too well with the final look. It can create unnecessary jarring notes in the overall pattern.
This is also very helpful for creating designs using multiples tiles, especially the big floral ones on the floor or even walls at times.
7. Modular Flooring Pattern
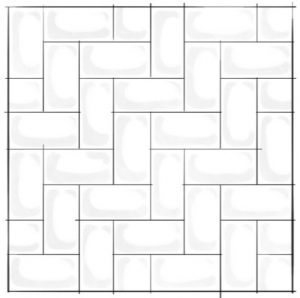
As the name indicates, this design or tiling pattern is most appropriate for floors. Especially, if you have tiles with a slight earthy look, this can create a very appealing pattern.
In this, you have a series of rectangular ones interspersed with small square ones. As a result, you have to be very careful with the cutting of the tiles.
Moreover, how you mix and match the tile pattern can help highlight the overall beauty of the design.
These can work well in rooms, offices as well as hotel lobbies. There can be a slight variation of the modular pattern as well.
8. Herringbone

This pattern is more commonly seen in outdoor walkways and hallways. It is called herringbone because of the criss-cross pattern that forms.
The V or the arrow forms a kind of arrow finder. It points to the direction you are heading towards.
However, this type of pattern also requires precision installation and accurate cutting. This is why you must account for at least 20% extra tiles. This is because the chances of breakage are very high in this case.
So you have to always account for the extra tiles pieces. You don’t want to run out of tiles midway and then use other designs.
9. Vertical Brick Bond
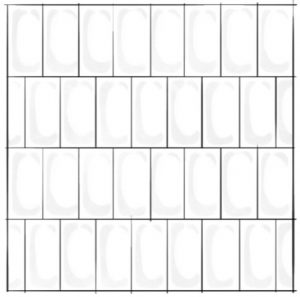
This kind of tile pattern is very simple. It is a functional pattern. Be it on the exterior walls or interiors; there are many applications of this tile pattern.
There are many permutation and combination that you can use this alignment for.
Of course, that depends on the overall type of tile that you choose as well as the wall or the floor that you choose to cover.
This pattern gives a rather contemporary look and is pretty versatile in its appeal on the whole.
10. Stacked Layout
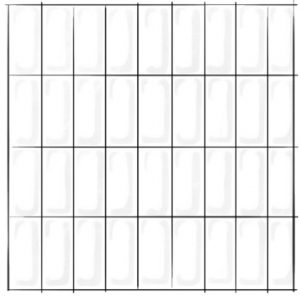
The rectangular tiles are best suited for this pattern. You see them on bathroom walls most commonly. But you can also install this pattern in other smaller rooms.
In fact, this is one of the simplest patterns that you can execute rather flawlessly.
In case you want to introduce a mosaic strip, this pattern can highlight the motifs most distinctly.
This pattern is popular amongst those opting for the do it yourself tile installation at home.
There are no complicated curves, and you can easily achieve this effect by placing the tiles in a linear fashion, albeit vertically. Dry fitting will help you reduce cost.
If you are looking for tiles installation services, keep in touch us now.


